Showing posts with label Buttons. Show all posts

8.06.2012

Vintage Elements Charm Necklace


I have been making a lot of new jewelry for my upcoming craft show.  Here's one of the newest in progress.

And here's the finished necklace:


It includes a rusty washer (which has been sealed), chandelier crystal, a piece of a ruler, a zipper pull, buttons, clock hand and a pretty bead from a broken vintage necklace.


3.09.2012

What to do with buttons

I LOVE buttons!  I bet a lot of you do, too!

Here are some links to buttons related posts:


Stacked Button Necklace Tutorial


Use it for the middle of a Fabric Flower

Use it for an accent on a Decoupage Jar (Video Tutorial)


Button Rings ( I sell these at my booth at BUiLDiNG CHARACTER in Lancaster, PA.  If you want to learn to make them, I'm working on a digital wire wrapping workshop!  Make sure to join my tutorial newsletter to know when it's available!)

3.01.2012

Tutorial: Stacked Button Necklace

I recently came into possession of a lot of buttons (to add to my growing collection.)  I love buttons and even though I don't always know exactly what I am going to do with them, if I see a deal on them, I'll buy them!

I have made button necklaces before, but this is the first one like this.  I made earrings in this style previously, which were so cute, too!

Materials and Tools:

  • Buttons ( I used 62.  If you are a smaller stature person, you'll need less)
  • Wire (I used 24 gauge wire)
  • Chain
  • 4 jump rings (I used 3 4mm jump rings and 1 7 mm jump ring)
  • Wire cutters
  • Round nose pliers
  • Needle nose pliers

Step #1
Pick out buttons that want to use.  I used just 2 colors:  purple and gray.  I have a lot of those colors, plus I knew they would match outfits I have.  You can definitely use different colors, more colors, etc.  You'll only see the sides of the buttons, so keep that in mind.

Also the shank type of buttons won't really work for this project.  (See photo below for what I'm talking about.)
Shank button.  Won't work for this project.

Step #2
Cut off about 12 inches of wire.

Step #3


Make a loop on one end of the wire.

Step #4

Start stacking buttons on the one by one, like you would beads.  You could add a bead on each end.


Step #5
Add a loop to the other side of the buttons and trim off the excess wire.


Step #6

Decide how long you want your necklace to be.  Measure how long the button piece you just made is and subtract that from how long you would like your necklace to be.  Cut a piece of chain the length that is left.  Then cut the piece of chain in 2 equal lengths.

Step #7

Open a jump ring (I used a 4 mm jump ring) and add the chain to the button piece.  Repeat on the other side.

Step #8
Add a jump ring to one side, for 1/2 a clasp.  (I used a 7 mm jump ring)

Step #9
Open a jump ring (I used a 4 mm) and add a lobster clasp to the other side.

Step #10
Enjoy your new necklace!


Note:

  1. You can use beading wire instead of silver wire, and then make loops and crimp. 
  2. You can use any color buttons, however, shank buttons won't work for this project.
  3. Use any kind of chain you desire, and any clasp you would like!
  4. You can make this necklace as long or as short as you want!  Same goes for how many buttons you use!
  5. If you have questions about how to, or need more instructions on wire wrapping loops, I have a tutorial that teaches that!  Hardware Necklace and Bracelet teaches you basic wire wrapping and you make a couple awesome projects!

2.28.2012

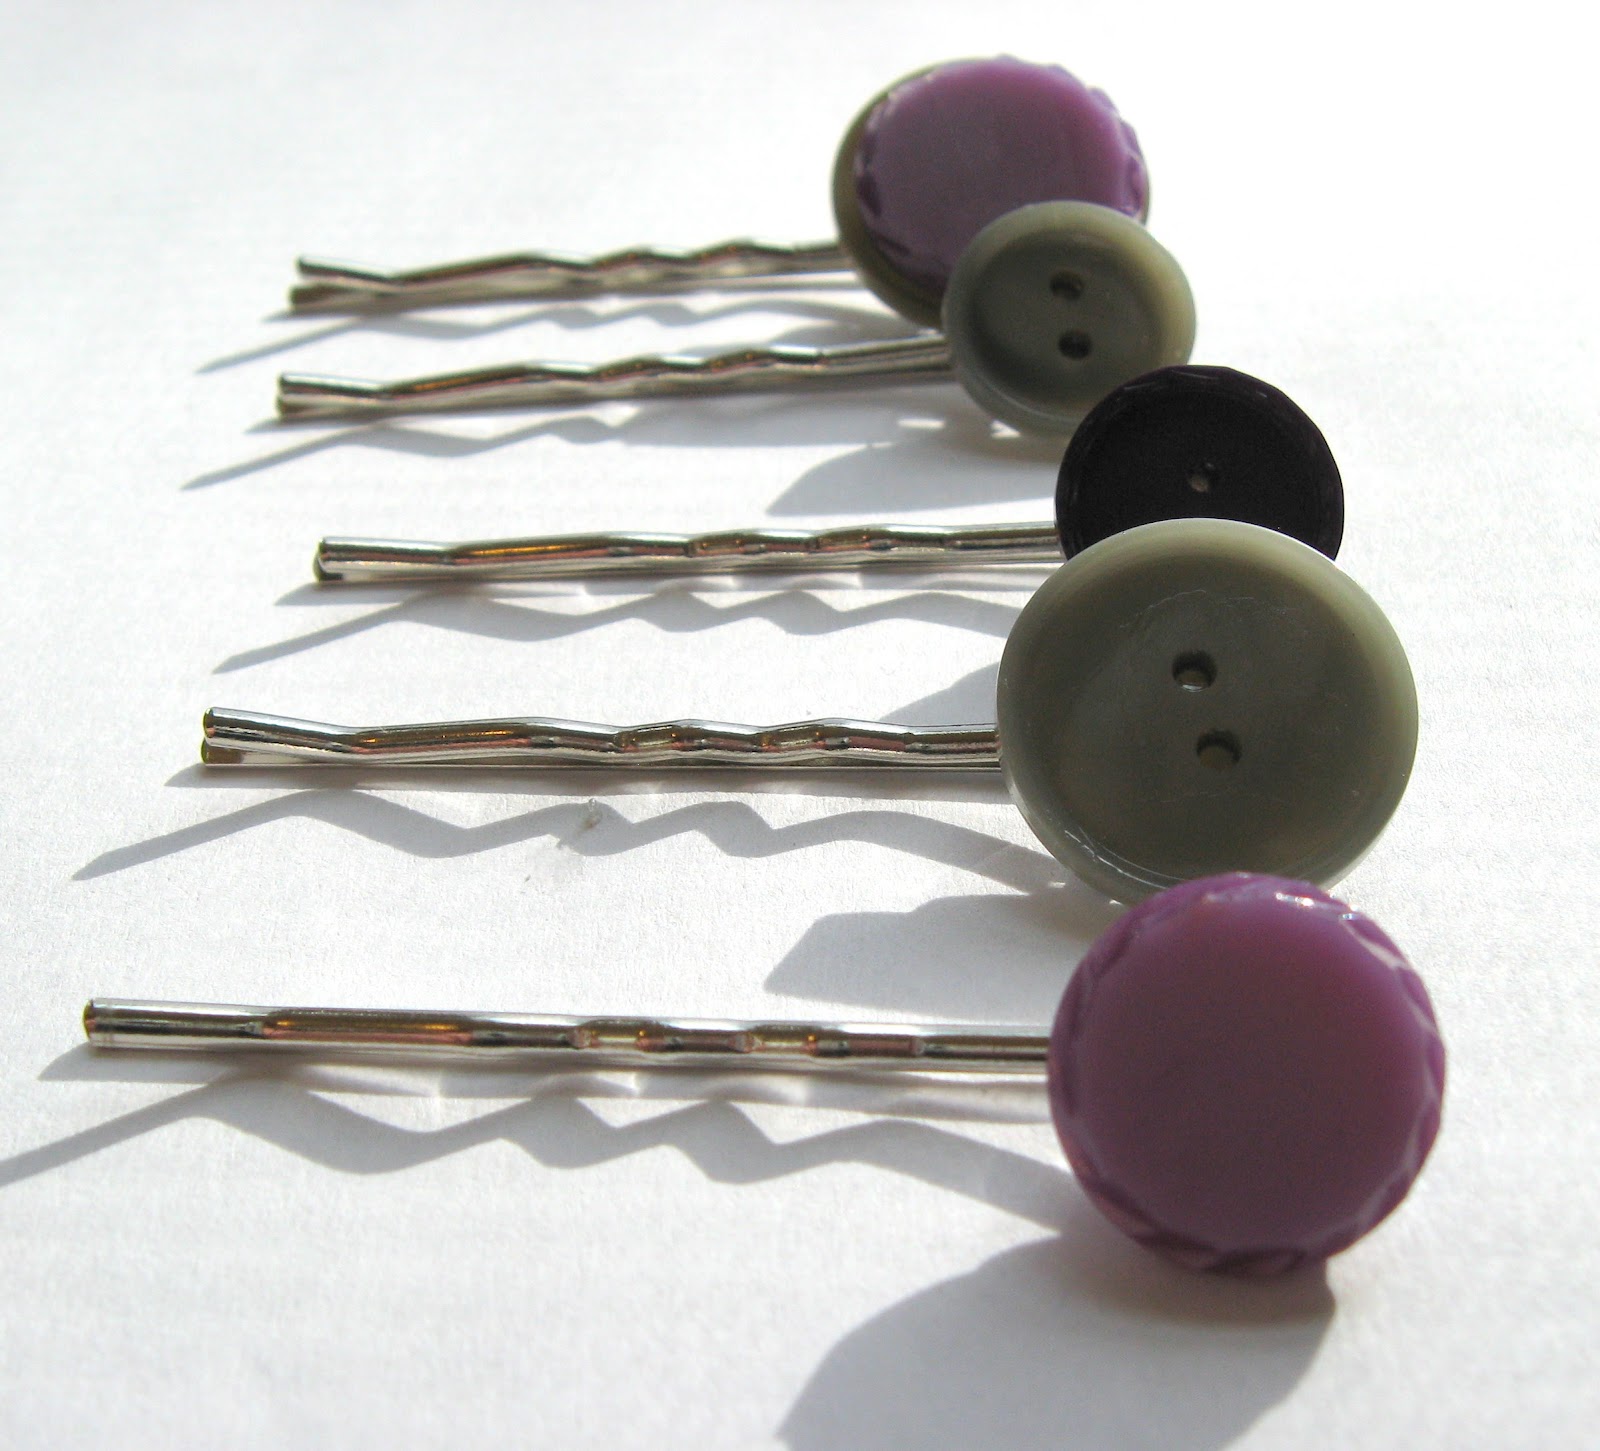
TUtorial: Button Hair Pins

It's so easy - with the right glue! - to make these adorable hair pins!

Tools and Supplies:
  • Buttons of your choice
  • Hair pins with a little round pad on them (I got mine at Hobby Lobby, you can find them online, too)
  • E6000 (find this at any craft store)
  • Toothpicks
Step #1
If you are making a stacked button hair pin (I did for this one) add glue to one button and put it on the other button.

If you are just using one button, skip to the next step.

(notice the string of glue in the photo - I should have wiped that off!  You can also pull it off after it dries, so don't worry!)

Step #2

Add glue to the pad of the hair pin.

Step #3
Place the hair pin onto the back of the button.

Step #4

Allow to dry at least overnight before wearing.

Step #5
Enjoy your new hair pins!

2.26.2012

Buttons!

I just got A LOT of buttons.  When you are out and about, thrifting, etc., keep your eyes peeled!  You really never know what you might come across!  

Speaking of buttons, I have 2 ideas this week for using your buttons.  Watch for 2 button tutorials this week!

Because of my new influx of buttons, I'm designing some new button jewelry, which I will be sharing soon! 

2.09.2012

Tutorial: Button Bouquet


Button Bouquet Tutorial


This is such a fun and easy project!  If you love buttons like I do, you’re going to love these cute bouquets!  Plus you need very few materials!

Materials:

Buttons (about 2-4 per “flower”)
Flower wire

Tool:

Pair of pliers
 
Step #1


Pick out buttons and make them into little bunches.  I like to use 3 or 4 buttons for each little flower.

I love using large buttons, but I don’t often have them.  If you are like me, you have a whole stash of buttons you love and don’t know exactly what to do with.  This is a great way to put them on display so you can see them all the time!

Step #2


Loosely bend your floral wire in half.


Step #3


Place your first button on the wire.  Take the top button and slide it onto the wire.  The top of the button should face the bend.  (In other words, the back of the button will be faced towards the 2 ends.)


Step #4


 Add the rest of your buttons for your first flower in the same way.


 Step #5


Use your pliers and twist the floral wire.  I like to twist tightly next to the buttons first.  Then I hold the pliers on the wire, but twist using the buttons.

Move the pliers down further as you get sections twisted.

 (Ummm, you can notice leftover glue on my fingers from a project I did right before this.  Sometimes glue just doesn’t wash off, I guess!)


 Step #6


Twist all the way to the end of the floral wire. 

That’s it!  You have one flower for your bouquet.

If you have a button with a shank, here’s how to make a button flower:


Step #1


Loosely bend the floral wire in half and place the wire through the shank.  Center it on the wire.

Step #2


Slide another button onto the wire in the same way as you did before.

Then continue the tutorial as above.


After you get a bunch of these individual flowers you can make a bouquet!


You can put them in a vase:


I put colorful beads in the bottom of the vase!


Or pull a bunch together and tie a ribbon around them:


 They made lovely presents!

If you would like a PDF version to save of this tutorial, head on over to my Crafty Pattern Store and you can download it for free!