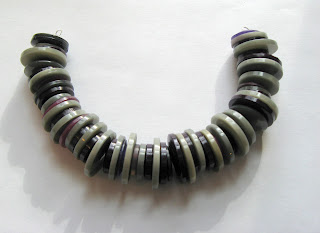
I recently came into possession of a lot of buttons (to add to my growing collection.) I love buttons and even though I don't always know exactly what I am going to do with them, if I see a deal on them, I'll buy them!
I have made button necklaces before, but this is the first one like this. I made earrings in this style previously, which were so cute, too!
Materials and Tools:
- Buttons ( I used 62. If you are a smaller stature person, you'll need less)
- Wire (I used 24 gauge wire)
- Chain
- 4 jump rings (I used 3 4mm jump rings and 1 7 mm jump ring)
- Wire cutters
- Round nose pliers
- Needle nose pliers
Step #1
Pick out buttons that want to use. I used just 2 colors: purple and gray. I have a lot of those colors, plus I knew they would match outfits I have. You can definitely use different colors, more colors, etc. You'll only see the sides of the buttons, so keep that in mind.
Also the shank type of buttons won't really work for this project. (See photo below for what I'm talking about.)
Shank button. Won't work for this project.
Step #2
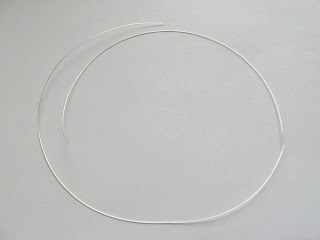
Cut off about 12 inches of wire.
Step #3
Make a loop on one end of the wire.
Step #4
Start stacking buttons on the one by one, like you would beads. You could add a bead on each end.
Step #5
Add a loop to the other side of the buttons and trim off the excess wire.Step #6
Decide how long you want your necklace to be. Measure how long the button piece you just made is and subtract that from how long you would like your necklace to be. Cut a piece of chain the length that is left. Then cut the piece of chain in 2 equal lengths.
Step #7
Open a jump ring (I used a 4 mm jump ring) and add the chain to the button piece. Repeat on the other side.
Step #8
Add a jump ring to one side, for 1/2 a clasp. (I used a 7 mm jump ring)
Step #9
Open a jump ring (I used a 4 mm) and add a lobster clasp to the other side.
Step #10
Enjoy your new necklace!Note:
- You can use beading wire instead of silver wire, and then make loops and crimp.
- You can use any color buttons, however, shank buttons won't work for this project.
- Use any kind of chain you desire, and any clasp you would like!
- You can make this necklace as long or as short as you want! Same goes for how many buttons you use!
- If you have questions about how to, or need more instructions on wire wrapping loops, I have a tutorial that teaches that! Hardware Necklace and Bracelet teaches you basic wire wrapping and you make a couple awesome projects!


No comments:
Post a Comment