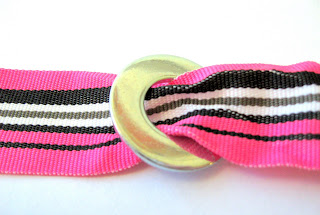
This tutorial is fun and simple! Give yourself an edgy look with a feminine twist.
Supplies:
Ribbon *
5 Washers
I used about 30 inches of 1 inch wide ribbon. My neck is relatively larger than most women. You want enough room to tie a sweet bow in the back.
You can also use smaller washers with narrower ribbon.
Step #1
Look at your washer. There is a flat side and a rounded side. Pull 1 washer onto your ribbon (a little more than a third of the way from one end - from the left end for this photo.) Sit it so the rounded side is facing up.
Step #2
Pull a 2nd washer onto the ribbon. This time when you place it on the ribbon the flat side will be facing up (for the moment). The 2 rounded sides are facing each other.
Step #3
Pull the ribbon back through the 1st washer as shown in the photo. The first washer is the washer on the bottom and the 2nd washer is caught by the ribbon near the top.
Step #4
Pull the ribbon so that the washer is tight on the ribbon. Position the 2nd washer so the rounded side is facing up and it's layered over the 1st washer.
Step #5
Pull the ribbon back up through the 2nd washer.
Step #6
Follow steps #2, 3, 4 and 5 for all of the washers.
Step #7
Pull the ribbon up through the last washer.
Step #8
Tie your Washer Ribbon Choker around your neck!
That's all there is to it!
Variety:
For a variation, you could use end crimps made for ribbon on the ends and add a clasp instead of tying a bow. Or you could make a bracelet. Like I said above, you can use smaller washers with smaller ribbon.


No comments:
Post a Comment